Google Colab Comes to VS Code: Complete Setup Guide and Real-World Review
Thomas Chong
2025-11-18T12:00:00
Introduction
If you're like most developers working with machine learning or data science, you've probably experienced this frustrating workflow:
- Write code in VS Code (your familiar, powerful IDE)
- Realize you need GPU/TPU compute
- Open a browser, navigate to Google Colab
- Upload your notebook to Google Drive
- Copy-paste code between environments
- Lose version control, lose your IDE features, lose your sanity
For years, developers have been stuck choosing between powerful IDE features (VS Code) and accessible cloud compute (Colab). You could have one or the other, but not both seamlessly integrated.
That changed on November 13, 2025, when Google officially launched the Colab VS Code extension.
What This Means
The Colab VS Code extension bridges these two worlds. You can now:
- Use VS Code's full IDE capabilities (Git, extensions, debugging, terminal)
- Connect directly to Colab's cloud runtimes (GPU, TPU, CPU)
- Work with notebooks locally without uploading to Google Drive
- Maintain your project structure and version control
This isn't just a convenience feature—it fundamentally changes how you can develop ML projects. No more context switching between browser tabs and your IDE. No more manual file syncing. Just seamless cloud compute in your favorite editor.
What You'll Learn
In this guide, you'll learn:
- How to install and configure the Colab VS Code extension
- Step-by-step setup process with screenshots
- Real-world benefits and use cases
- Current limitations and workarounds
- Best practices for using Colab in VS Code
Prerequisites
Before we start, make sure you have:
- VS Code installed (any recent version)
- Google account (for Colab access)
- Basic familiarity with Jupyter notebooks (helpful but not required)
That's it. No GPU, no credit card, no complex setup. Let's dive in.
Installation and Setup
Step 1: Install the Colab VS Code Extension
The installation process is straightforward:
- Open VS Code
- Open Extensions view:
- Click the Extensions icon in the Activity Bar (left sidebar)
- Or press
Cmd+Shift+X(Mac) /Ctrl+Shift+X(Windows/Linux)
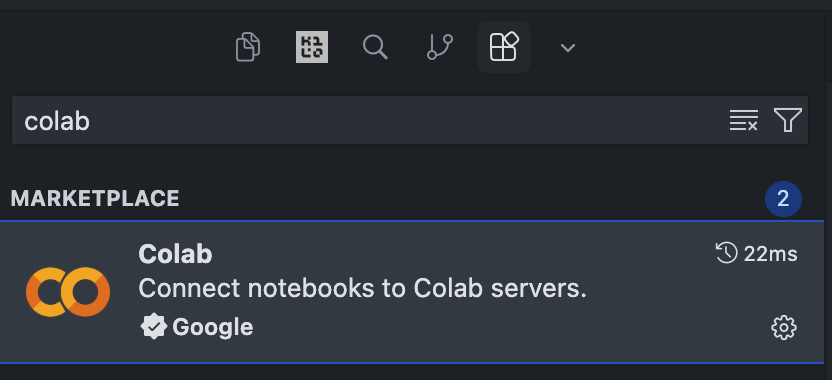
- Search for "Colab"
- Install the official Google Colab extension
- Look for the extension published by Google
- Click the Install button
- Install dependencies (if prompted):
- The extension may require the Jupyter extension
- VS Code will prompt you to install it if needed
- Click Install on any dependency prompts
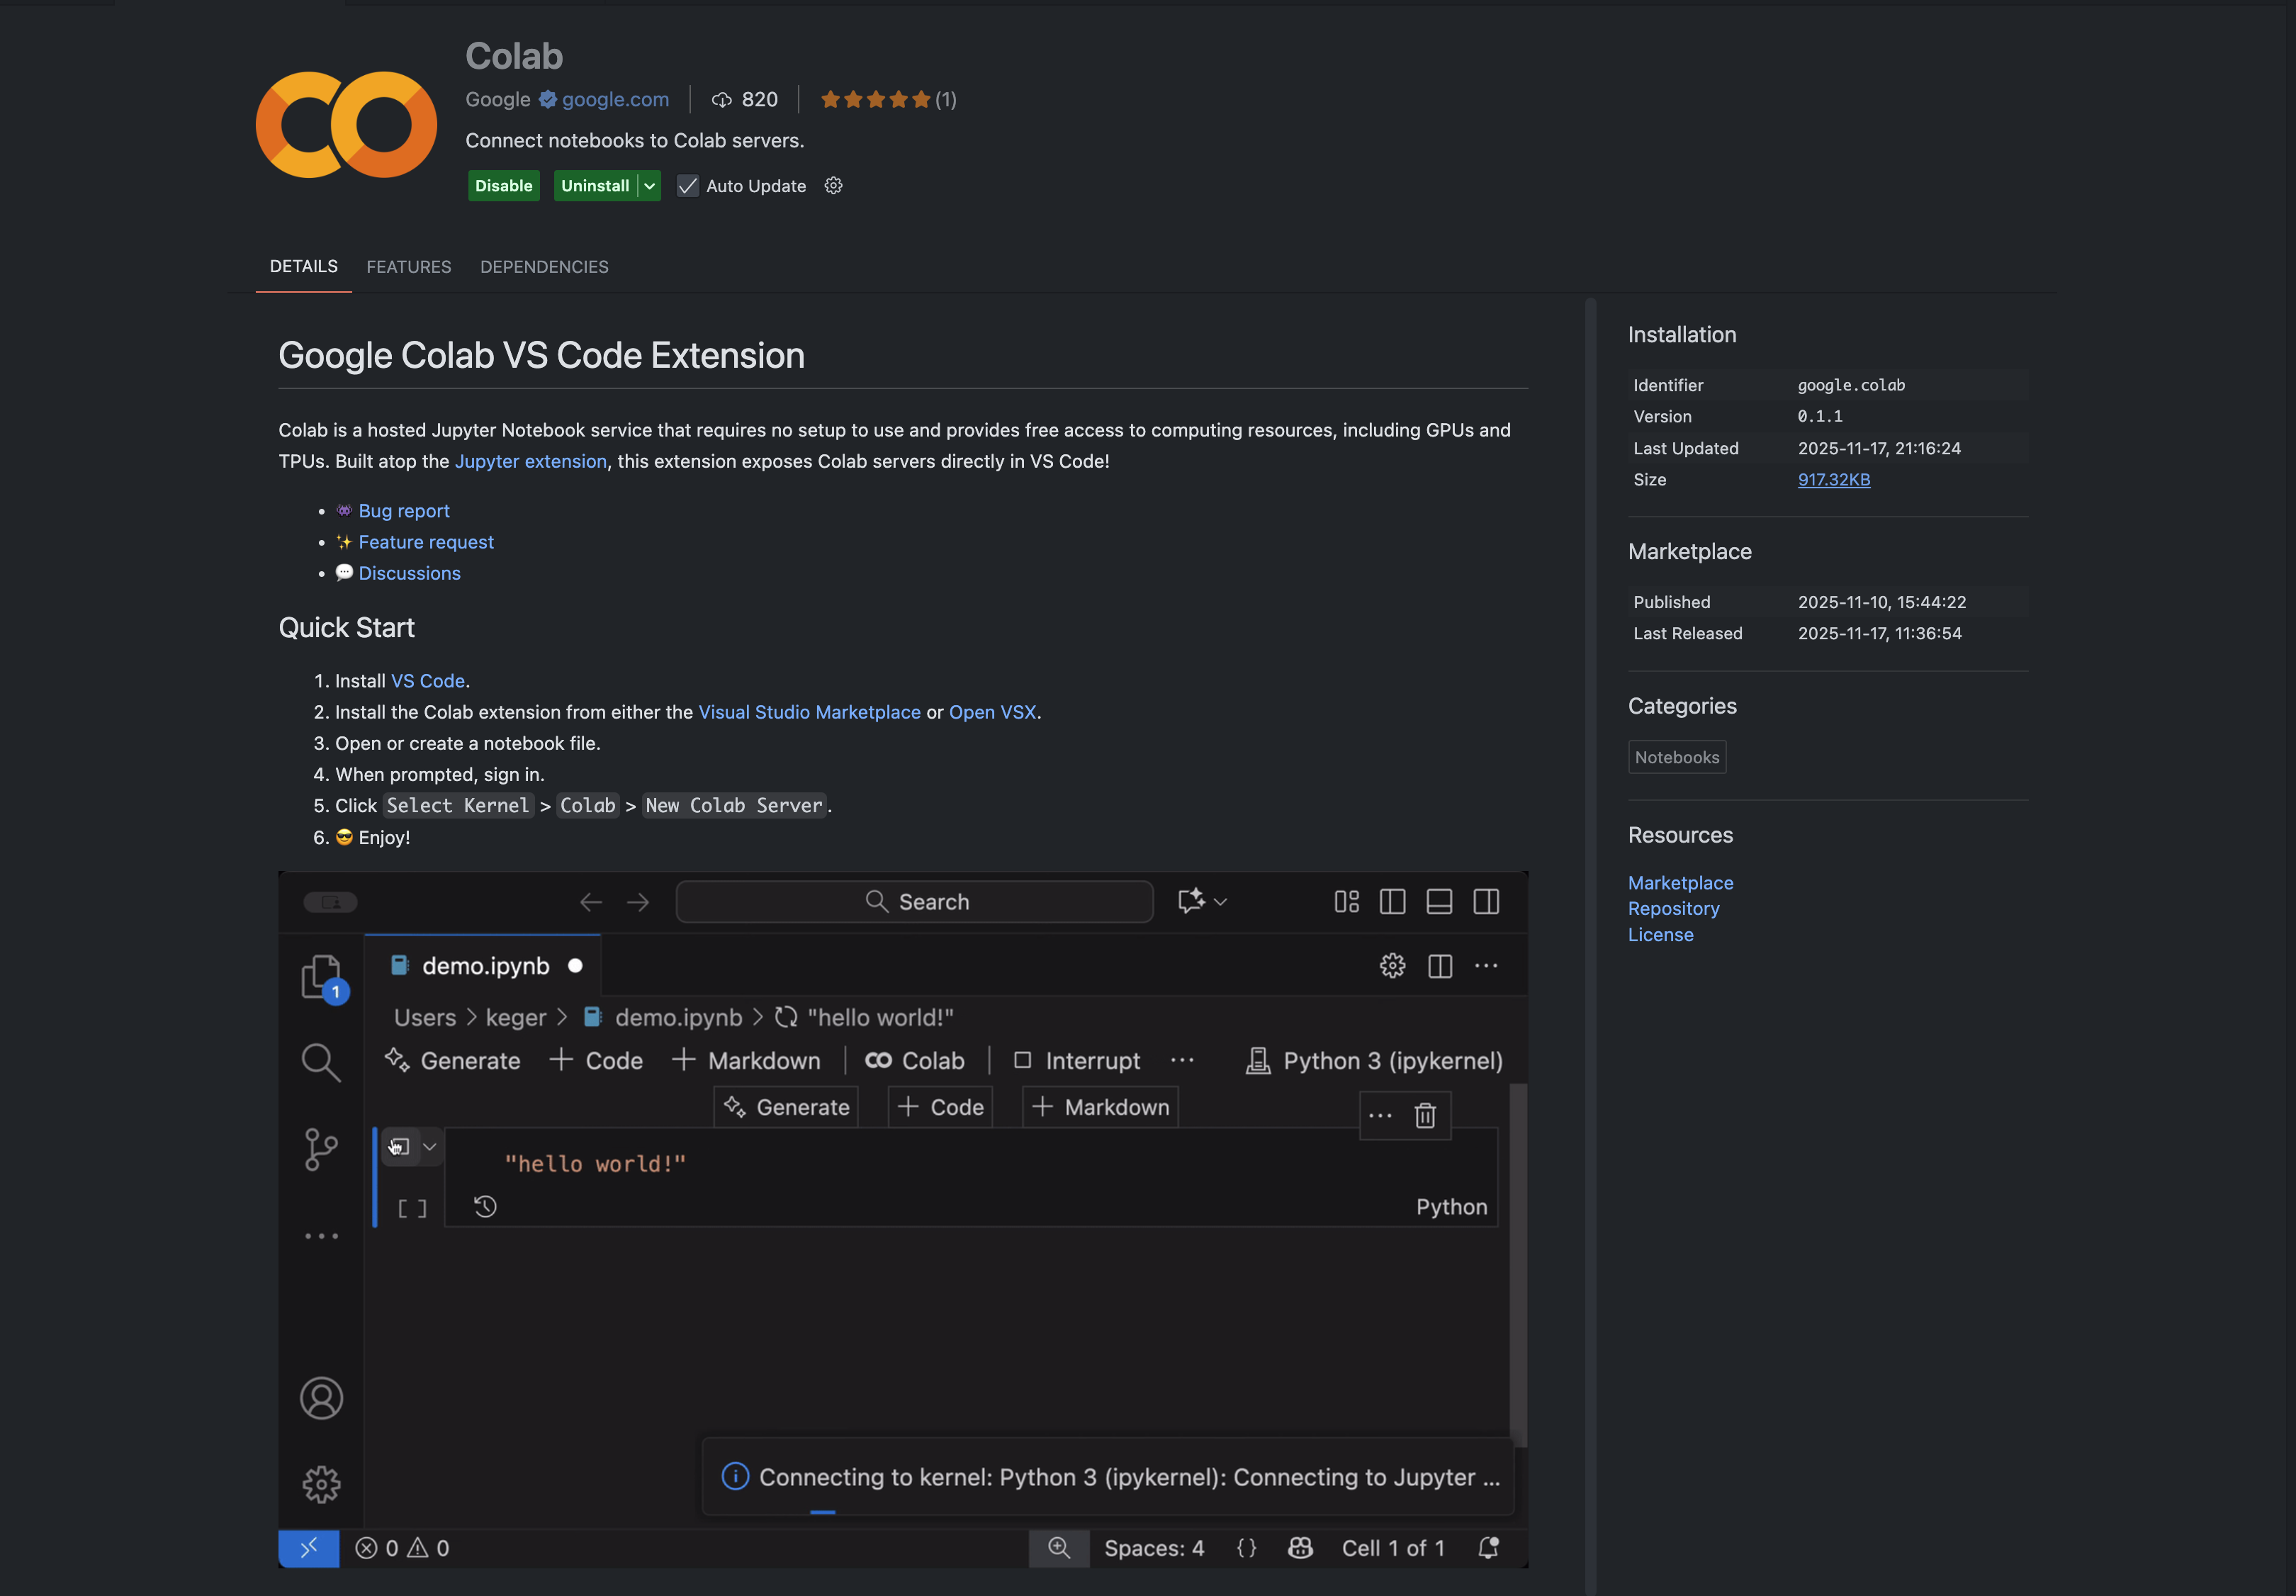
That's it! The extension integrates seamlessly with VS Code's existing Jupyter support, so if you've used notebooks in VS Code before, this will feel familiar.
Step 2: Connect to a Colab Runtime
Now comes the exciting part—connecting to Google's cloud compute:
-
Create or open a
.ipynbfile in VS Code- You can create a new notebook:
File → New File → Jupyter Notebook - Or open an existing notebook file
- You can create a new notebook:
-
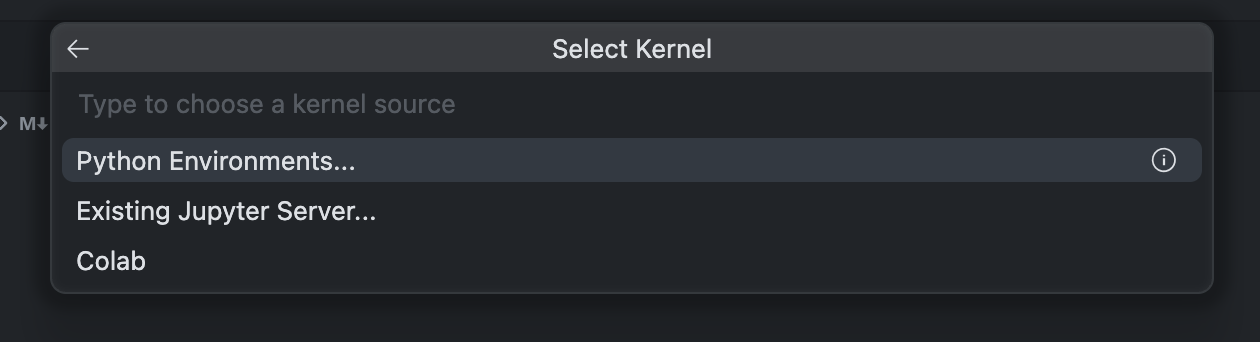
Select the kernel:
- Click the kernel selector in the top-right corner of the notebook
- Or click "Select Kernel" if prompted

-
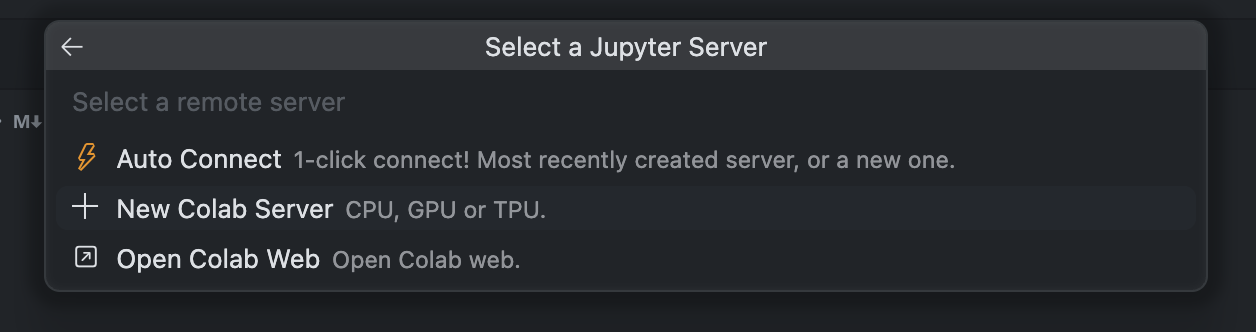
Choose Colab:
- Click "Select Another Kernel"
- Choose "Colab" from the list
-
Create a new Colab server:
- Select "New Colab Server"
- Sign in with your Google account (if not already signed in)
- Grant necessary permissions
-
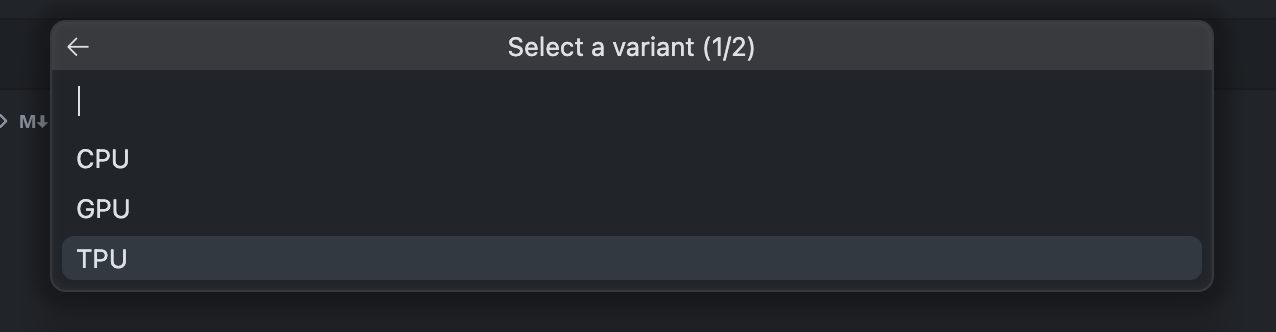
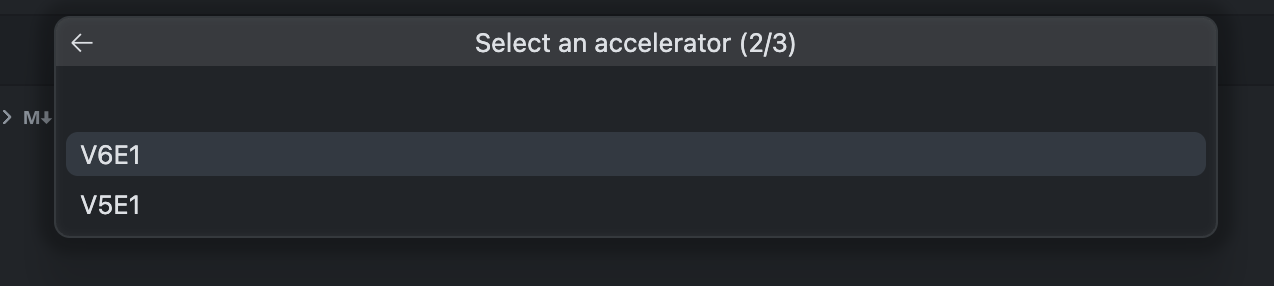
Select your runtime:
- Choose CPU, GPU, or TPU
- For GPU: Select T4 (free tier) or A100/L4 (Colab Pro/Pro+)
- For TPU: Select v5e or v6e (availability varies)
-
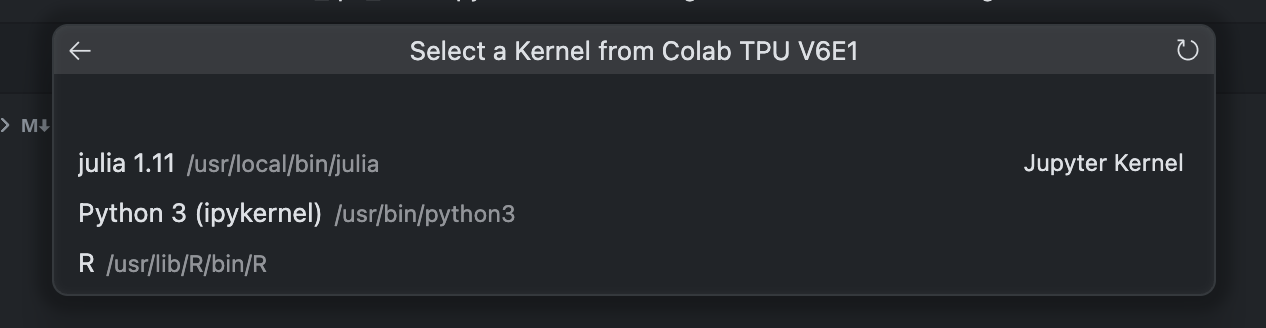
Select the Kernel:
- After the server is provisioned, select the Python 3 kernel
Within seconds, you're connected to a cloud runtime. No manual VM provisioning, no SSH keys, no Docker containers to configure.
Step 3: Verify Your Runtime
Let's confirm you're connected to the right hardware:
For GPU:
!nvidia-smi
For TPU:
import jax

devices = jax.devices()
print(f"Detected {len(devices)} TPU device(s)")
print(f"Device type: {devices[0].platform}")
print(f"TPU Kind: {devices[0].device_kind}")
For CPU:
import os
print(f"CPU count: {os.cpu_count()}")
If you see your expected hardware, you're all set!
Step 4: Set Up Server Alias (Important!)
Before you start working, set up a server alias:
-
When prompted, enter a name for your Colab server
-
This alias helps you reconnect to the same runtime later
-
Note: The alias field currently has a 10-character limit (a known limitation)
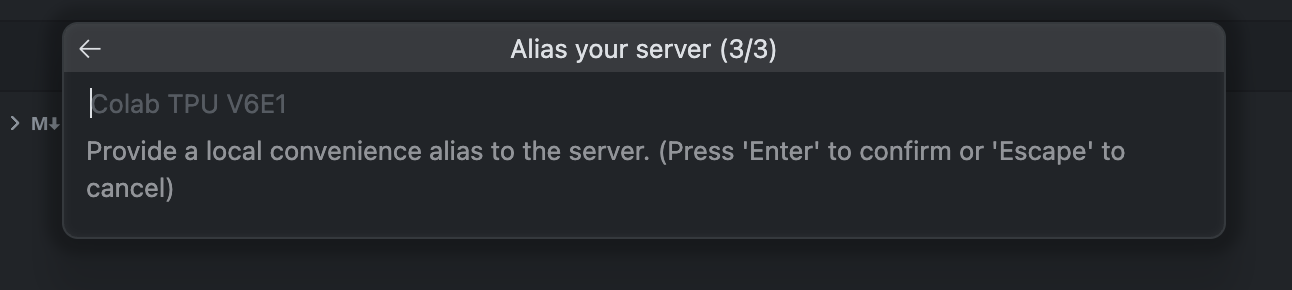
Why this matters: Without an alias, you'll need to create a new server each time, which can be inconvenient. The alias lets you quickly reconnect to your previous runtime configuration.
Pro tip: Use short, descriptive names like my-gpu-dev or tpu-test to stay within the character limit.
Key Benefits: Why This Extension Matters
After using the Colab VS Code extension extensively, here are the real-world benefits that make it a game-changer:
1. Unified Workflow: No More Context Switching
The Old Way:
- Develop in VS Code
- Switch to browser for Colab
- Copy code back and forth
- Lose Git history
- Lose IDE features (autocomplete, debugging, extensions)
The New Way:
- Everything happens in VS Code
- Notebooks, code editing, model inference, and environment management all in one place
- Seamless workflow without breaking your development rhythm
This alone saves hours of context switching and reduces cognitive load significantly.
2. Direct Access to Google Cloud Compute
You get the same Colab runtimes you're used to, but without leaving your IDE:
- Free tier: T4 GPUs, basic TPUs
- Colab Pro/Pro+: A100, L4 GPUs, premium TPUs
- No manual provisioning: Just select your runtime and go
This is especially powerful for:
- Large model inference (Gemma, Llama, etc.)
- Training experiments
- Data preprocessing at scale
- Prototyping ML applications
3. No More Manual File Syncing
Before: Upload notebooks to Google Drive, sync files manually, lose version control
Now:
- Work with notebooks directly in your project directory
- Use Git for version control (notebooks are JSON files)
- Keep your project structure intact
- No more "where did I save that notebook?" moments
4. Full IDE Integration
You get all of VS Code's powerful features:
- Git integration: Version control your notebooks alongside your code
- Extensions: Use any VS Code extension (Python, Jupyter, AI assistants, etc.)
- Terminal: Access Colab's terminal directly from VS Code
- Debugging: Set breakpoints and debug notebook code
- IntelliSense: Full autocomplete and code intelligence
- Workspace settings: Consistent environment across your project
5. Server Alias and Environment Reuse
Once you set up a server alias, you can:
- Quickly reconnect to the same runtime configuration
- Maintain consistent environments across sessions
- Avoid reconfiguring hardware settings repeatedly
This is particularly useful for:
- Stable inference environments
- Repeated model testing
- Large-scale data preprocessing workflows
6. Faster Development Iteration
The integration significantly speeds up your development cycle:
- No upload delays: Work directly with local files
- Faster testing: Run code immediately without browser overhead
- Better debugging: Use VS Code's debugging tools
- AI assistance: Leverage GitHub Copilot, Cursor, or other AI coding assistants
7. Lower Hardware Barrier
For developers without high-end GPUs:
- Zero hardware investment: Use cloud compute from any machine
- Free tier available: Start experimenting without costs
- Scalable: Upgrade to Pro when needed
- Accessible: Works on any laptop, anywhere
This democratizes ML development, making it accessible to students, researchers, and startups without institutional compute resources.
Current Limitations and Workarounds
While the extension is powerful, there are some limitations to be aware of. Here's what I've discovered through real-world usage:
1. Colab Secrets Not Available
The Problem: Colab's built-in Secrets feature (for storing API keys securely) isn't available in the VS Code extension yet.
Workaround:
Use environment variables with .env files:
# Create .env file in your project
# OPENAI_API_KEY=your_key_here
# HUGGINGFACE_TOKEN=your_token_here

# Load in notebook
from dotenv import load_dotenv
import os

load_dotenv()
api_key = os.getenv('OPENAI_API_KEY')
Why this matters: If you're migrating from web Colab, you'll need to adjust your secret management approach. The .env method works, but it's a different workflow than Colab's native Secrets.
2. Google Drive Mounting Not Supported
The Problem: You can't mount Google Drive folders in the VS Code extension (yet). This is a common workflow for Colab users who store datasets or models in Drive.
Workaround:
- Use local files: Store data in your project directory
- Use cloud storage APIs: Access Google Cloud Storage, S3, or other storage directly
- Download datasets: Use
wgetorcurlto download files directly to the Colab runtime
Impact: This is probably the biggest limitation if you're heavily invested in the Drive workflow. However, using local project files is often better for version control anyway.
3. Server Status Not Obvious
The Problem: The UI doesn't make it obvious when Colab is running or how to stop it. You might forget to disconnect and burn through credits.
Workaround:
- Always disconnect: Go to
Colab → Remove Serverwhen done - Check Colab web: Visit colab.research.google.com → Runtime → Manage sessions
- Set reminders: Use a timer or calendar reminder to check your sessions
Why this matters: Colab Pro/Pro+ users pay for compute time. Forgetting to disconnect can waste credits. This is a UX issue that Google will likely improve in future updates.
4. Server Alias Character Limit
The Problem: The server alias field only accepts 10 characters, but Google's recommended naming convention exceeds this limit.
Workaround: Use abbreviations:
gpu-devinstead ofgpu-developmenttpu-testinstead oftpu-testing-envml-proj1instead ofmachine-learning-project-1
Impact: Minor inconvenience, but worth noting if you have specific naming conventions.
5. Limited Visual Feedback
The Problem: Compared to the web Colab interface, there's less visual feedback about runtime status, resource usage, and connection health.
Workaround:
- Check runtime status programmatically:
# Check GPU usage
!nvidia-smi

# Check TPU status
import jax
print(jax.devices())

# Check memory
import psutil
print(f"Memory: {psutil.virtual_memory().percent}%")
Impact: Less critical, but the web interface's visual indicators are helpful for monitoring. You'll need to rely more on code-based checks.
Best Practices
Based on my experience, here are some recommendations for getting the most out of the extension:
1. Organize Your Project Structure
Keep notebooks organized in your project:
my-ml-project/
├── notebooks/
│   ├── 01-data-exploration.ipynb
│   ├── 02-model-training.ipynb
│   └── 03-inference-testing.ipynb
├── src/
│   └── utils.py
├── data/
├── models/
└── .env  # For API keys
This keeps everything version-controlled and organized.
2. Use Git for Notebook Version Control
Notebooks are JSON files—they work great with Git:
# Track notebooks
git add notebooks/*.ipynb
git commit -m "Add data exploration notebook"

# Use .gitignore for outputs
echo "*.ipynb_checkpoints/" >> .gitignore
echo "outputs/" >> .gitignore
3. Always Disconnect When Done
Make it a habit:
- Finish your work
- Save your notebook
- Go to
Colab → Remove Server - Verify disconnection in Colab web interface
Set a reminder if needed—this saves credits.
4. Use Environment Variables for Secrets
Instead of hardcoding API keys:
# .env file (add to .gitignore!)
OPENAI_API_KEY=sk-...
HUGGINGFACE_TOKEN=hf_...

# In notebook
from dotenv import load_dotenv
import os
load_dotenv()
5. Leverage VS Code Extensions
Take advantage of VS Code's ecosystem:
- Python extension: Better IntelliSense
- Jupyter extension: Enhanced notebook features
- GitLens: Better Git visualization
- AI assistants: GitHub Copilot, Cursor, etc.
6. Test Locally First (When Possible)
For quick iterations:
- Test code logic locally with CPU
- Use Colab runtime for GPU/TPU workloads
- This saves Colab credits and speeds up development
7. Monitor Resource Usage
Keep an eye on your compute usage:
- Check Colab web dashboard regularly
- Monitor runtime duration
- Set usage limits if available
- Use free tier for experimentation, Pro for production work
Conclusion
The Colab VS Code extension represents a significant step forward in ML development tooling. By bringing cloud compute directly into your IDE, it eliminates the friction that has plagued developers for years.
Key Takeaways
✅ Unified workflow: No more switching between browser and IDE
✅ Full IDE features: Git, debugging, extensions all work seamlessly
✅ Cloud compute access: Free and paid tiers available
✅ Better project management: Version control and organization
✅ Lower barriers: Accessible to anyone with a laptop
What's Next
The extension is still in its early days, and Google is actively improving it. Based on the current limitations, here's what to expect:
Likely future improvements:
- Colab Secrets integration
- Google Drive mounting support
- Better visual feedback and status indicators
- Improved server management UI
- Extended alias character limits
For now:
- Use the workarounds provided in this guide
- Provide feedback to Google through their GitHub repository
- Enjoy the benefits while being aware of current limitations